Let's say you've already got a killer iPad writing setup. You've been thinking about getting into podcasting, and possibly even expanding this writing setup into a portable recording kit, but you're not sure where to start. The sheer variety of gear options alone is paralyzing.
We're here to help. With the gear and apps we recommend below, you can assemble your own podcasting-studio-in-a-bag, suitable for recording no matter where your travels take you. The best part is that you don't need a computer at all; the iPad plus a few pieces of gear are all you need.
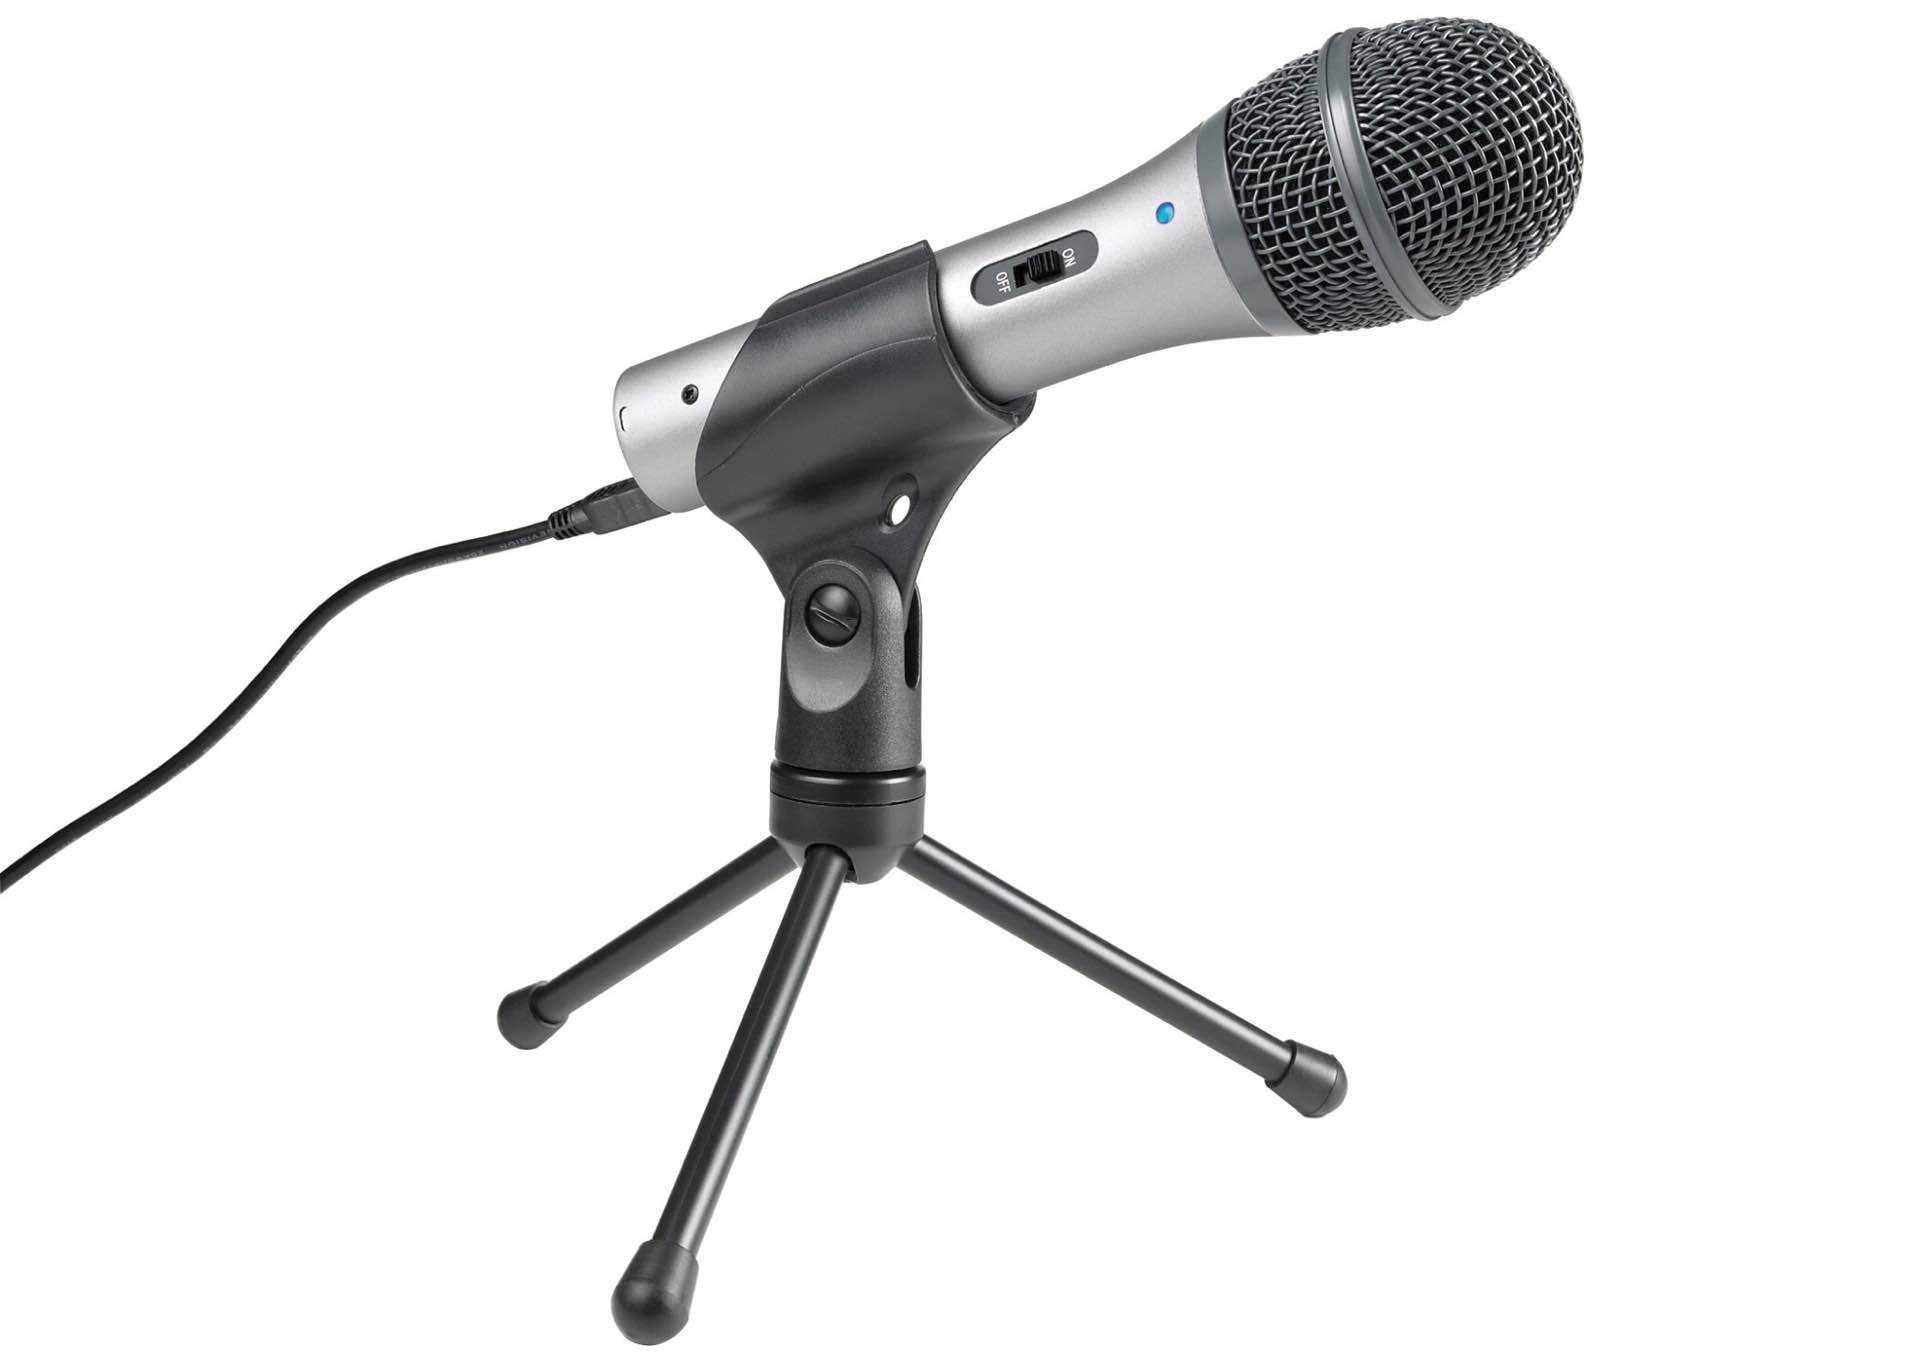
Audio-Technica's ATR2100-USB mic. ($59)
Audio-Technica ATR2100-USB Microphone »
Obviously, the first thing to consider in your kit is a podcasting mic. Audio Technica's ATR2100-USB microphone — which, for you audio nerds out there, is of the cardioid dynamic USB/XLR variety — is one of the best all-in-one solutions we've seen.
As Marco Arment says in his podcasting mic mega-review, the ATR2100 is great at eliminating room echo and background noise, provided you speak up closely to it. Each one comes with its own tripod desk stand, so there's no need to purchase one separately. There's also a built-in headphone jack so you can monitor your audio without hearing any distracting delays.
We recommend buying two ATR2100s. If you record with a guest in the same room, it's more comfortable for each to have their own mic, and altogether less awkward given how close you have to speak to the mic. Also, you don't necessarily need to use pop filters with ATR2100s, but these foam windscreens are a cheap and easy way to reduce unwanted noise even further (not to mention protect them from the unfortunate reality of speaker spit).
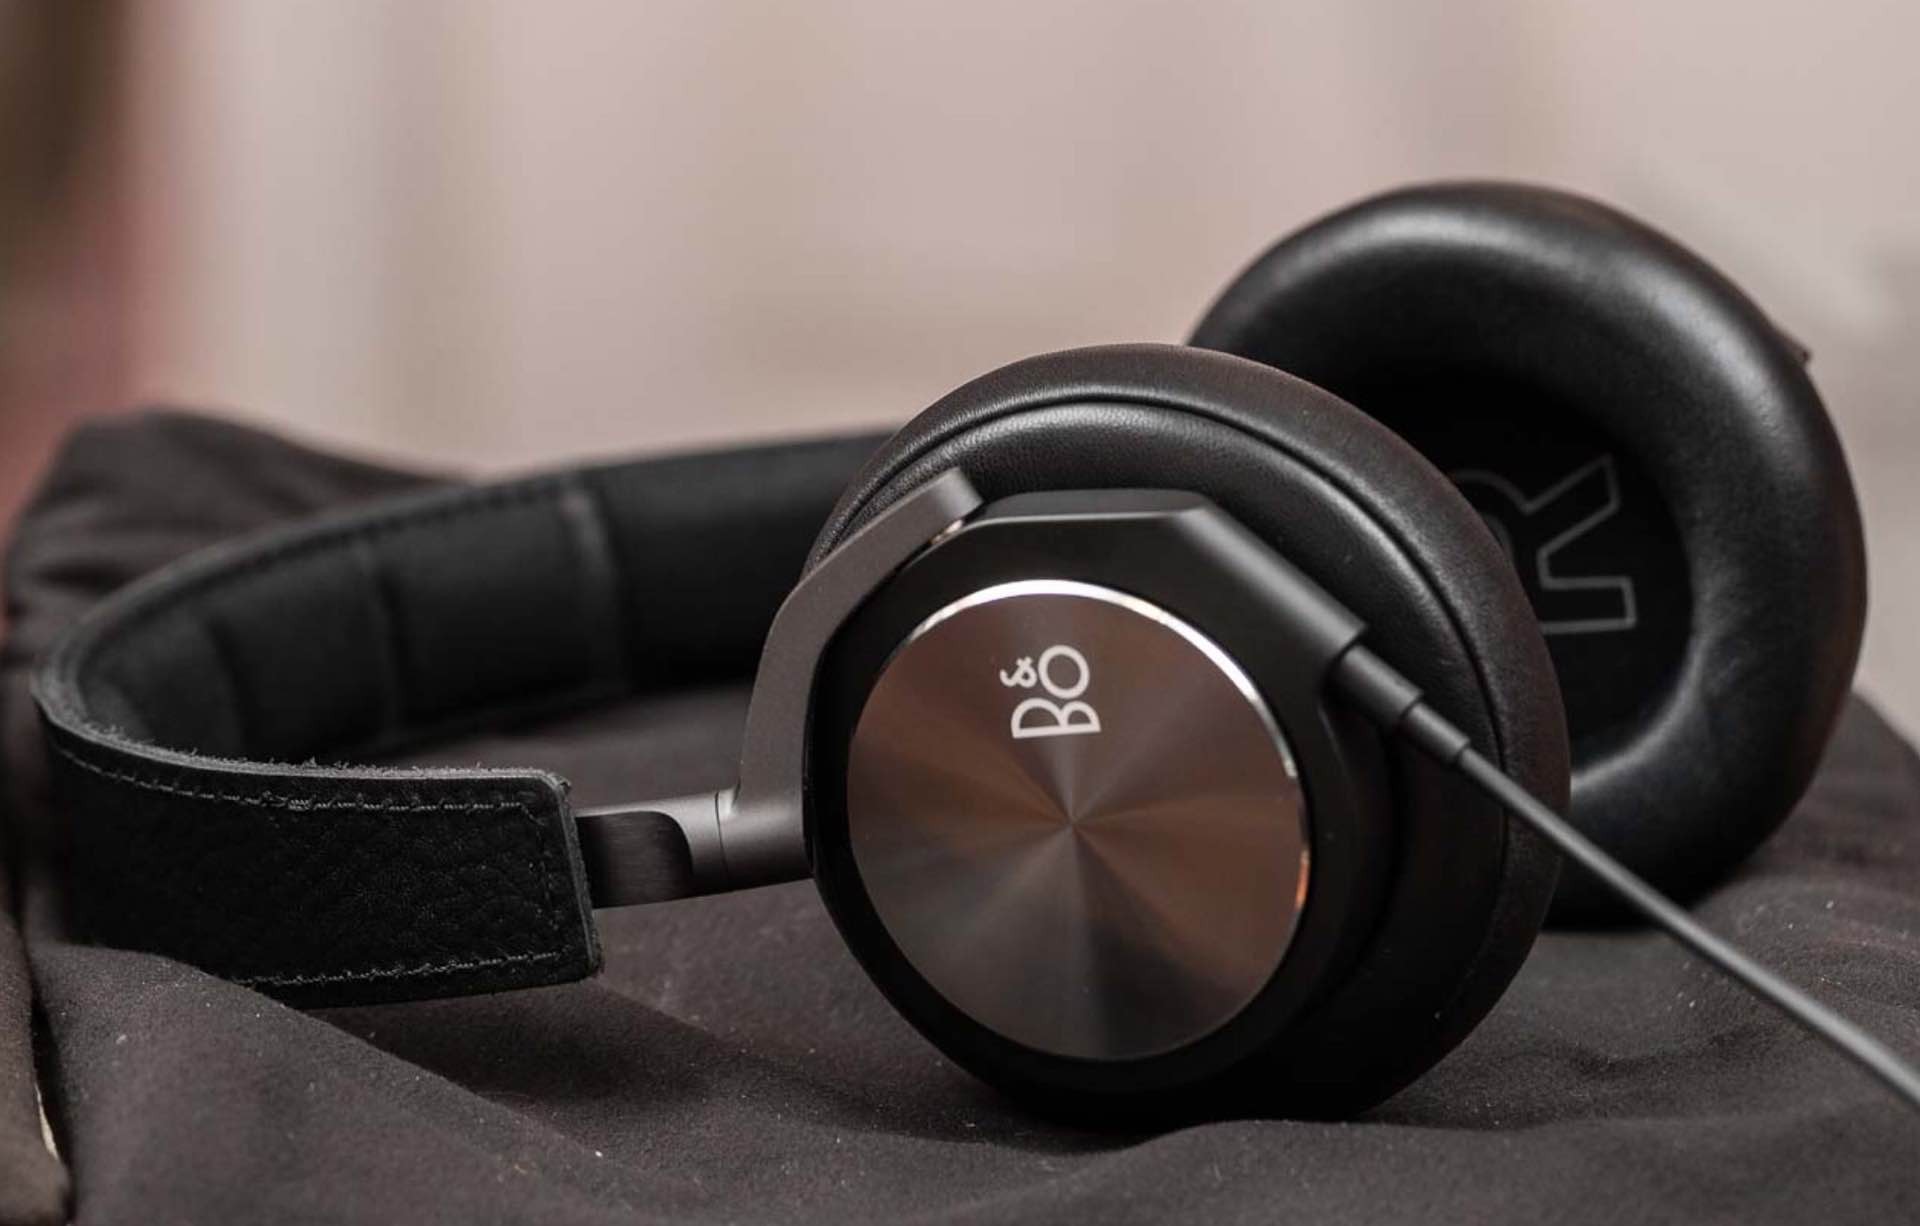
Bang & Olufsen's 2nd-gen H6 headphones. ($399)
Photo: Marco Arment
B&O H6 Headphones (2nd-Generation) »
As for what headphones to plug into your ATR2100 mic(s), we like the 2nd-generation B&O H6 headphones because they sound great, they're super comfy — genuine leather, soft lambskin, and memory foam, oh my — and they fold flat for easy storage while traveling.
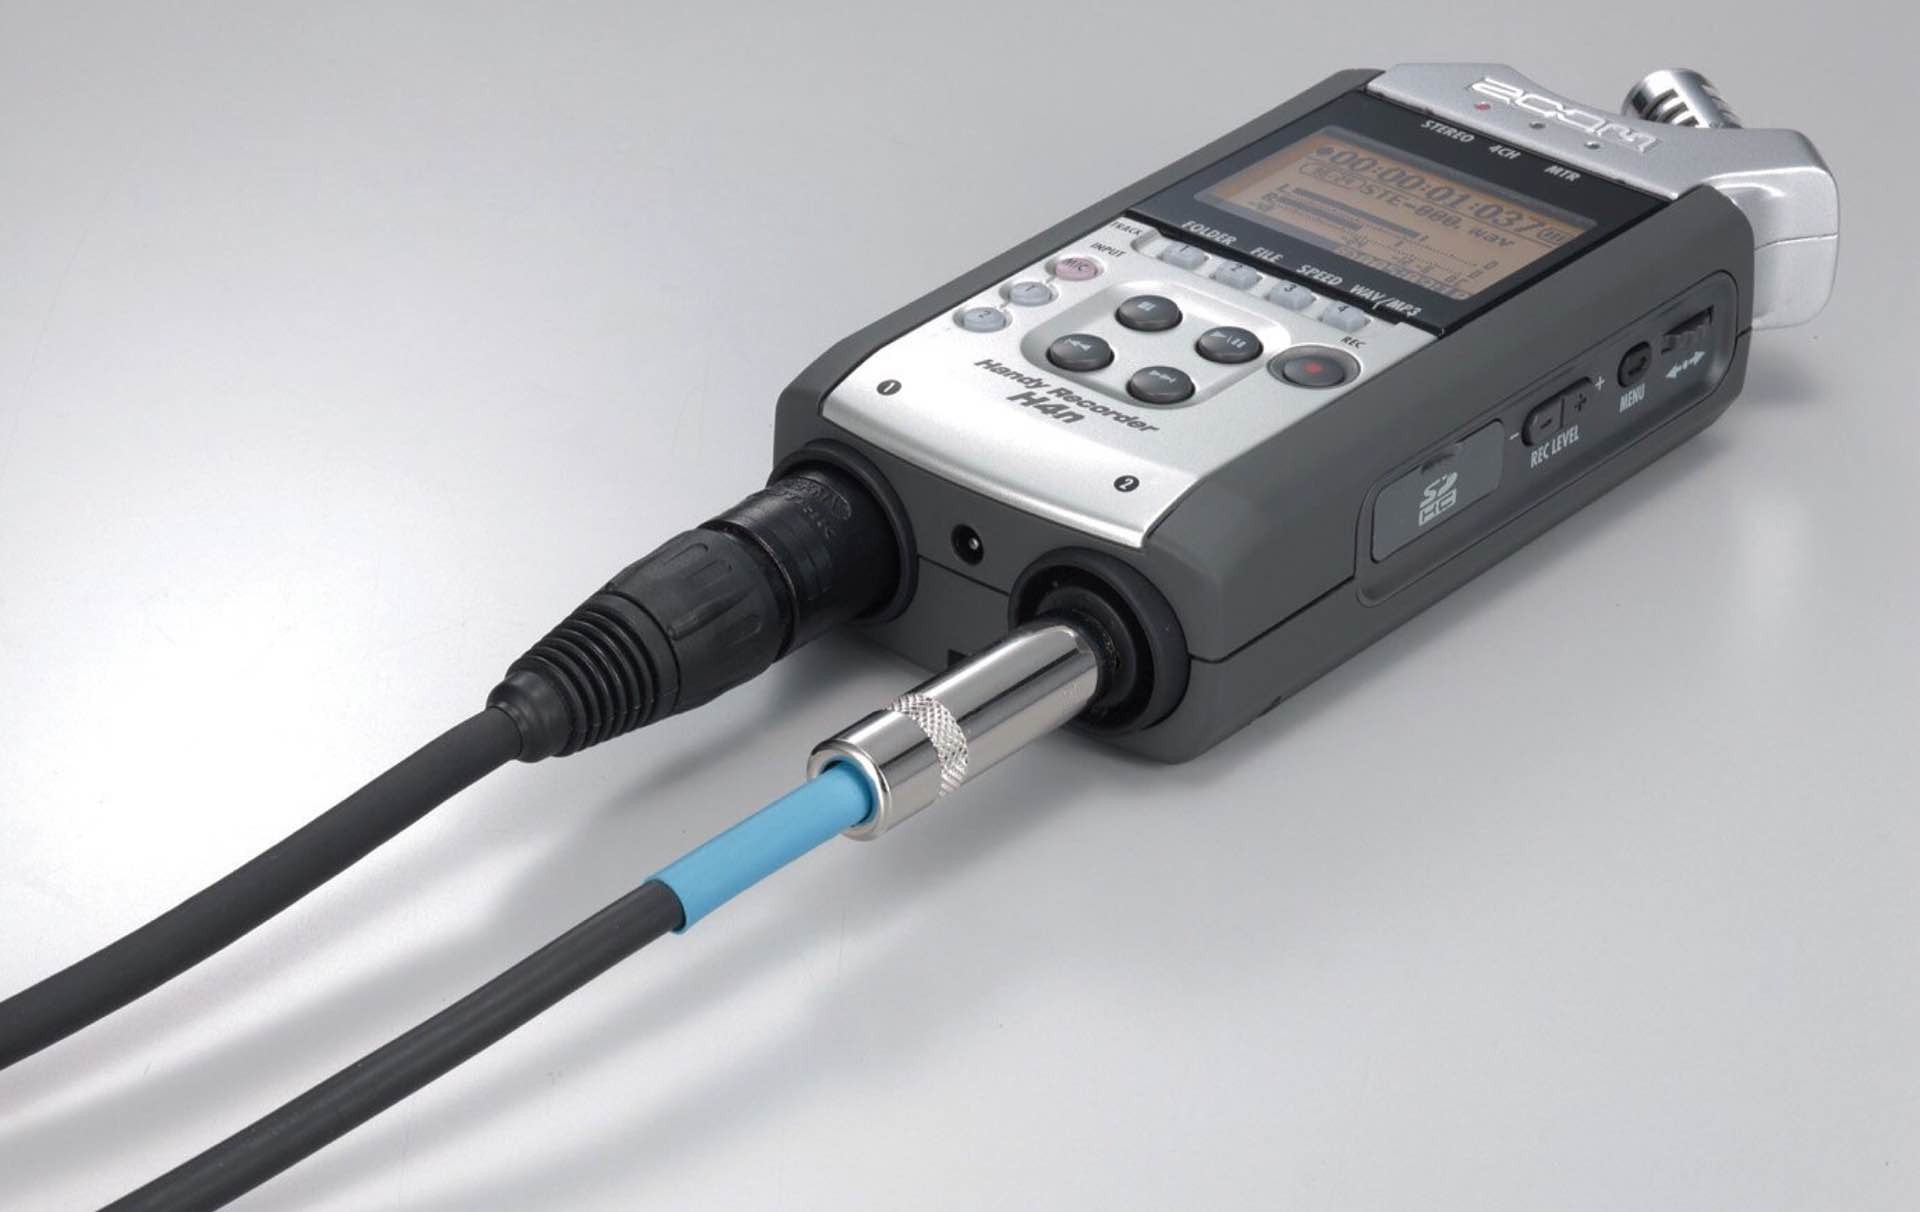
The Zoom H4n digital recorder. ($160)
Zoom H4n Digital Multi-Track Recorder »
The Zoom H4n is often considered to be the best mobile recording device around, and we agree. The reason it comes in handy in our particular setup is that it has two XLR inputs, so you can hook up both of those ATR2100 mics we recommended above, and record them simultaneously.
By recording into a single device this way, you don't have to worry about the audio getting out of sync and having to fix it later. Additionally, the audio you capture will be surprisingly high-quality for not being in a true studio. If you've got more than one guest to record, switch the H4n to "4CH" mode to record up to four channels — in this case, the two ATR2100s plus the H4n's own pair of built-in mics.
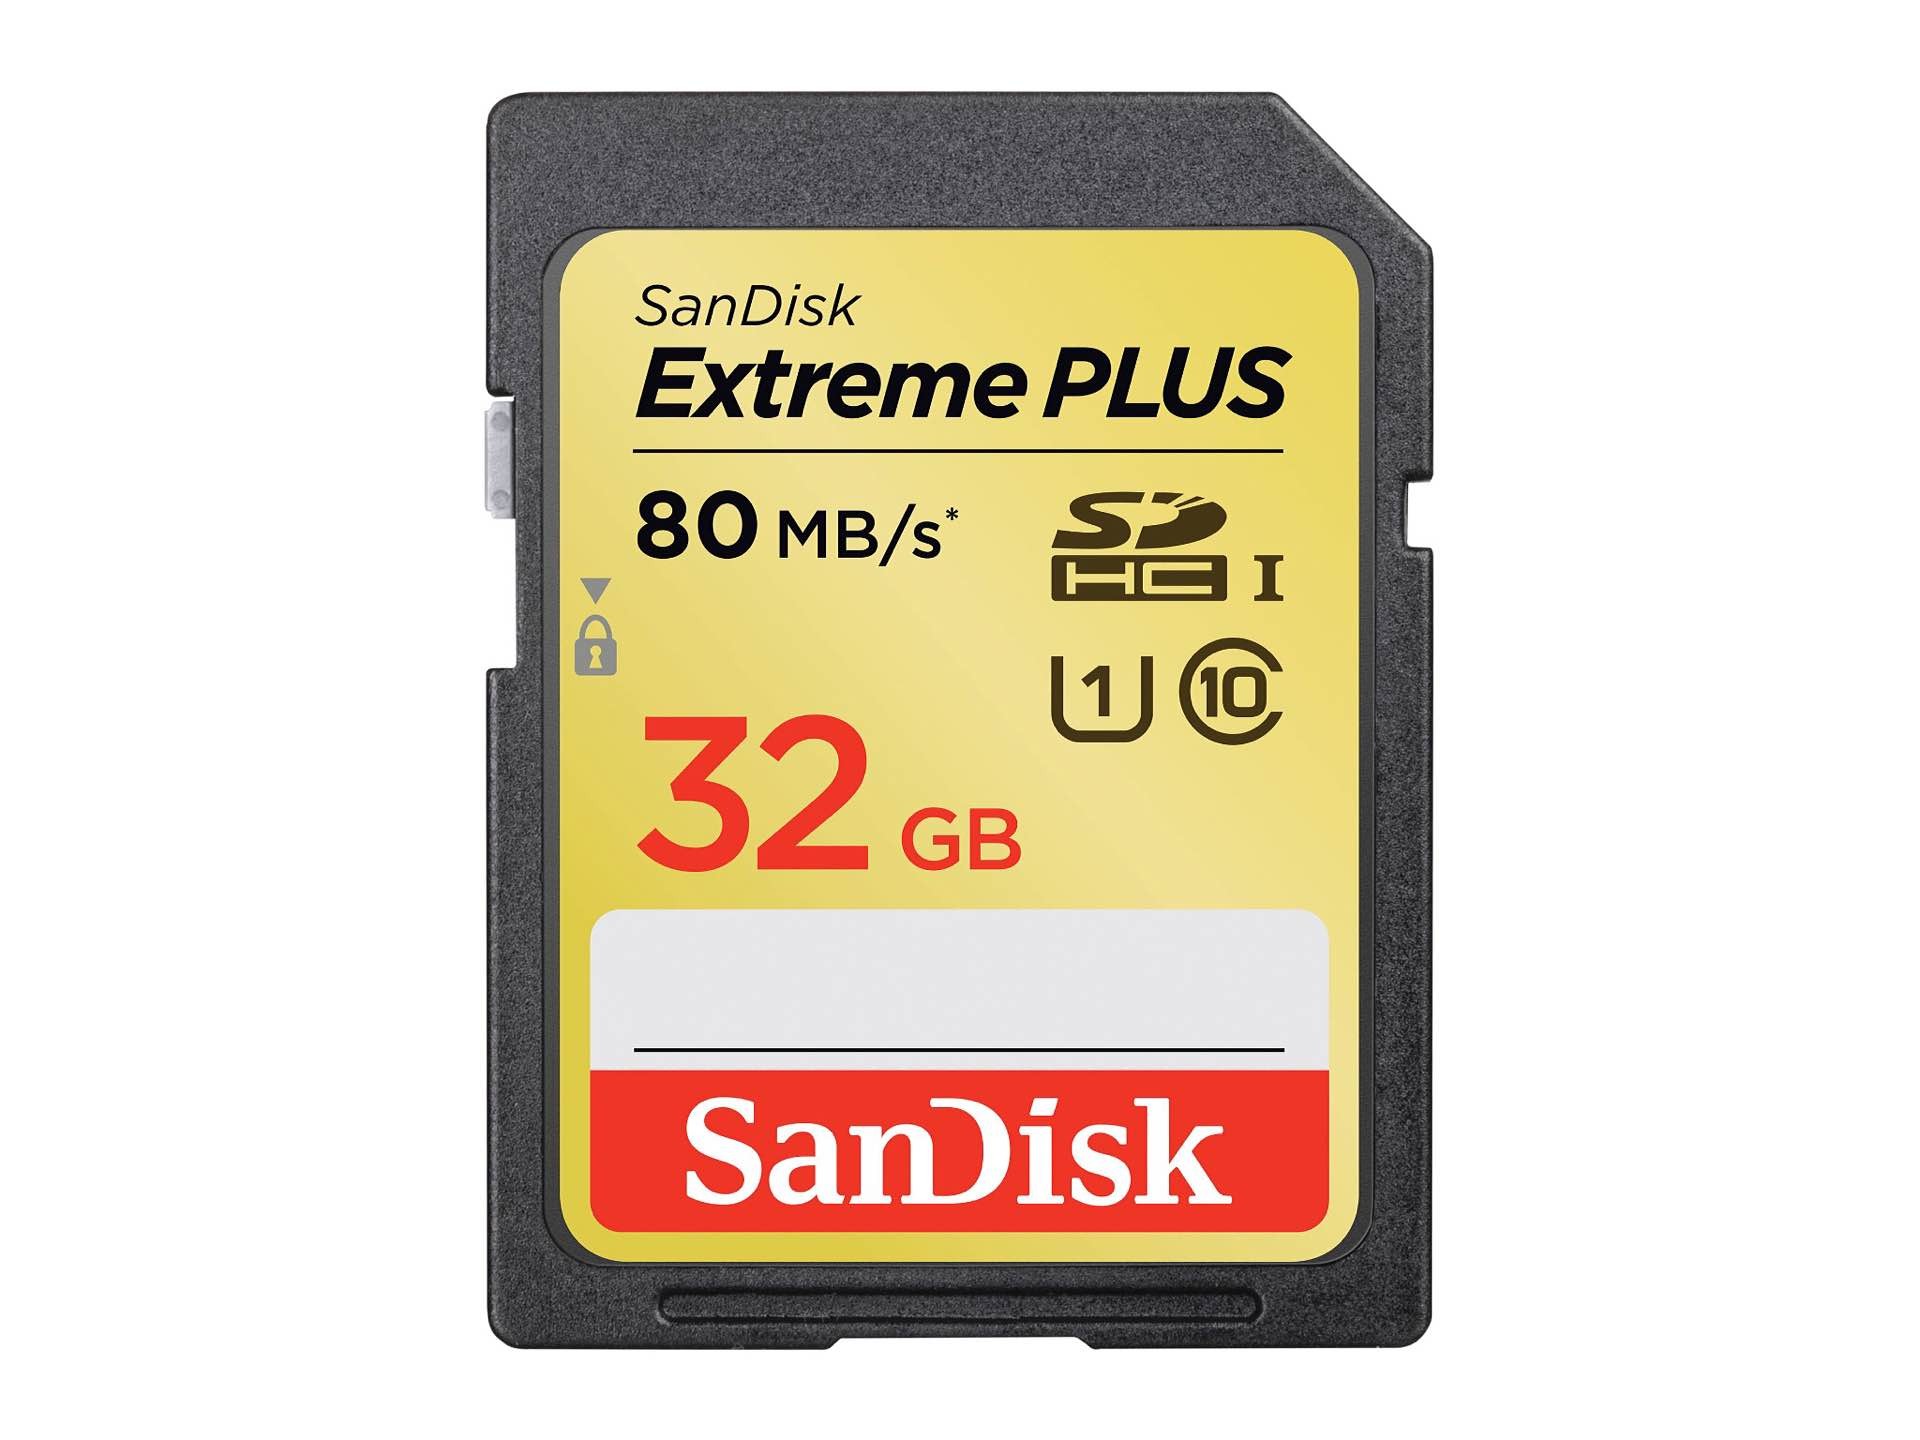
SanDisk's Extreme Plus 32GB SD card. ($31)
SanDisk Extreme Plus 32GB SD Card »
Recording podcasts directly to an iOS device is difficult at best, so you'll want to have the Zoom H4n record your audio to an SD card for transfer later.
The SanDisk Extreme Plus is arguably the best SD card you can get. It has extremely fast and reliable read/write speeds of 80 MB/s. We’ve used more than a few different types of SD cards (especially for photography purposes), and the SanDisk Extreme Plus never fails us when we need it.
We think the 32GB model is a sweet spot in terms of storage — it’s quite affordable (just $31) and can hold a good amount of audio so you're not having to constantly delete shows to make room for more.
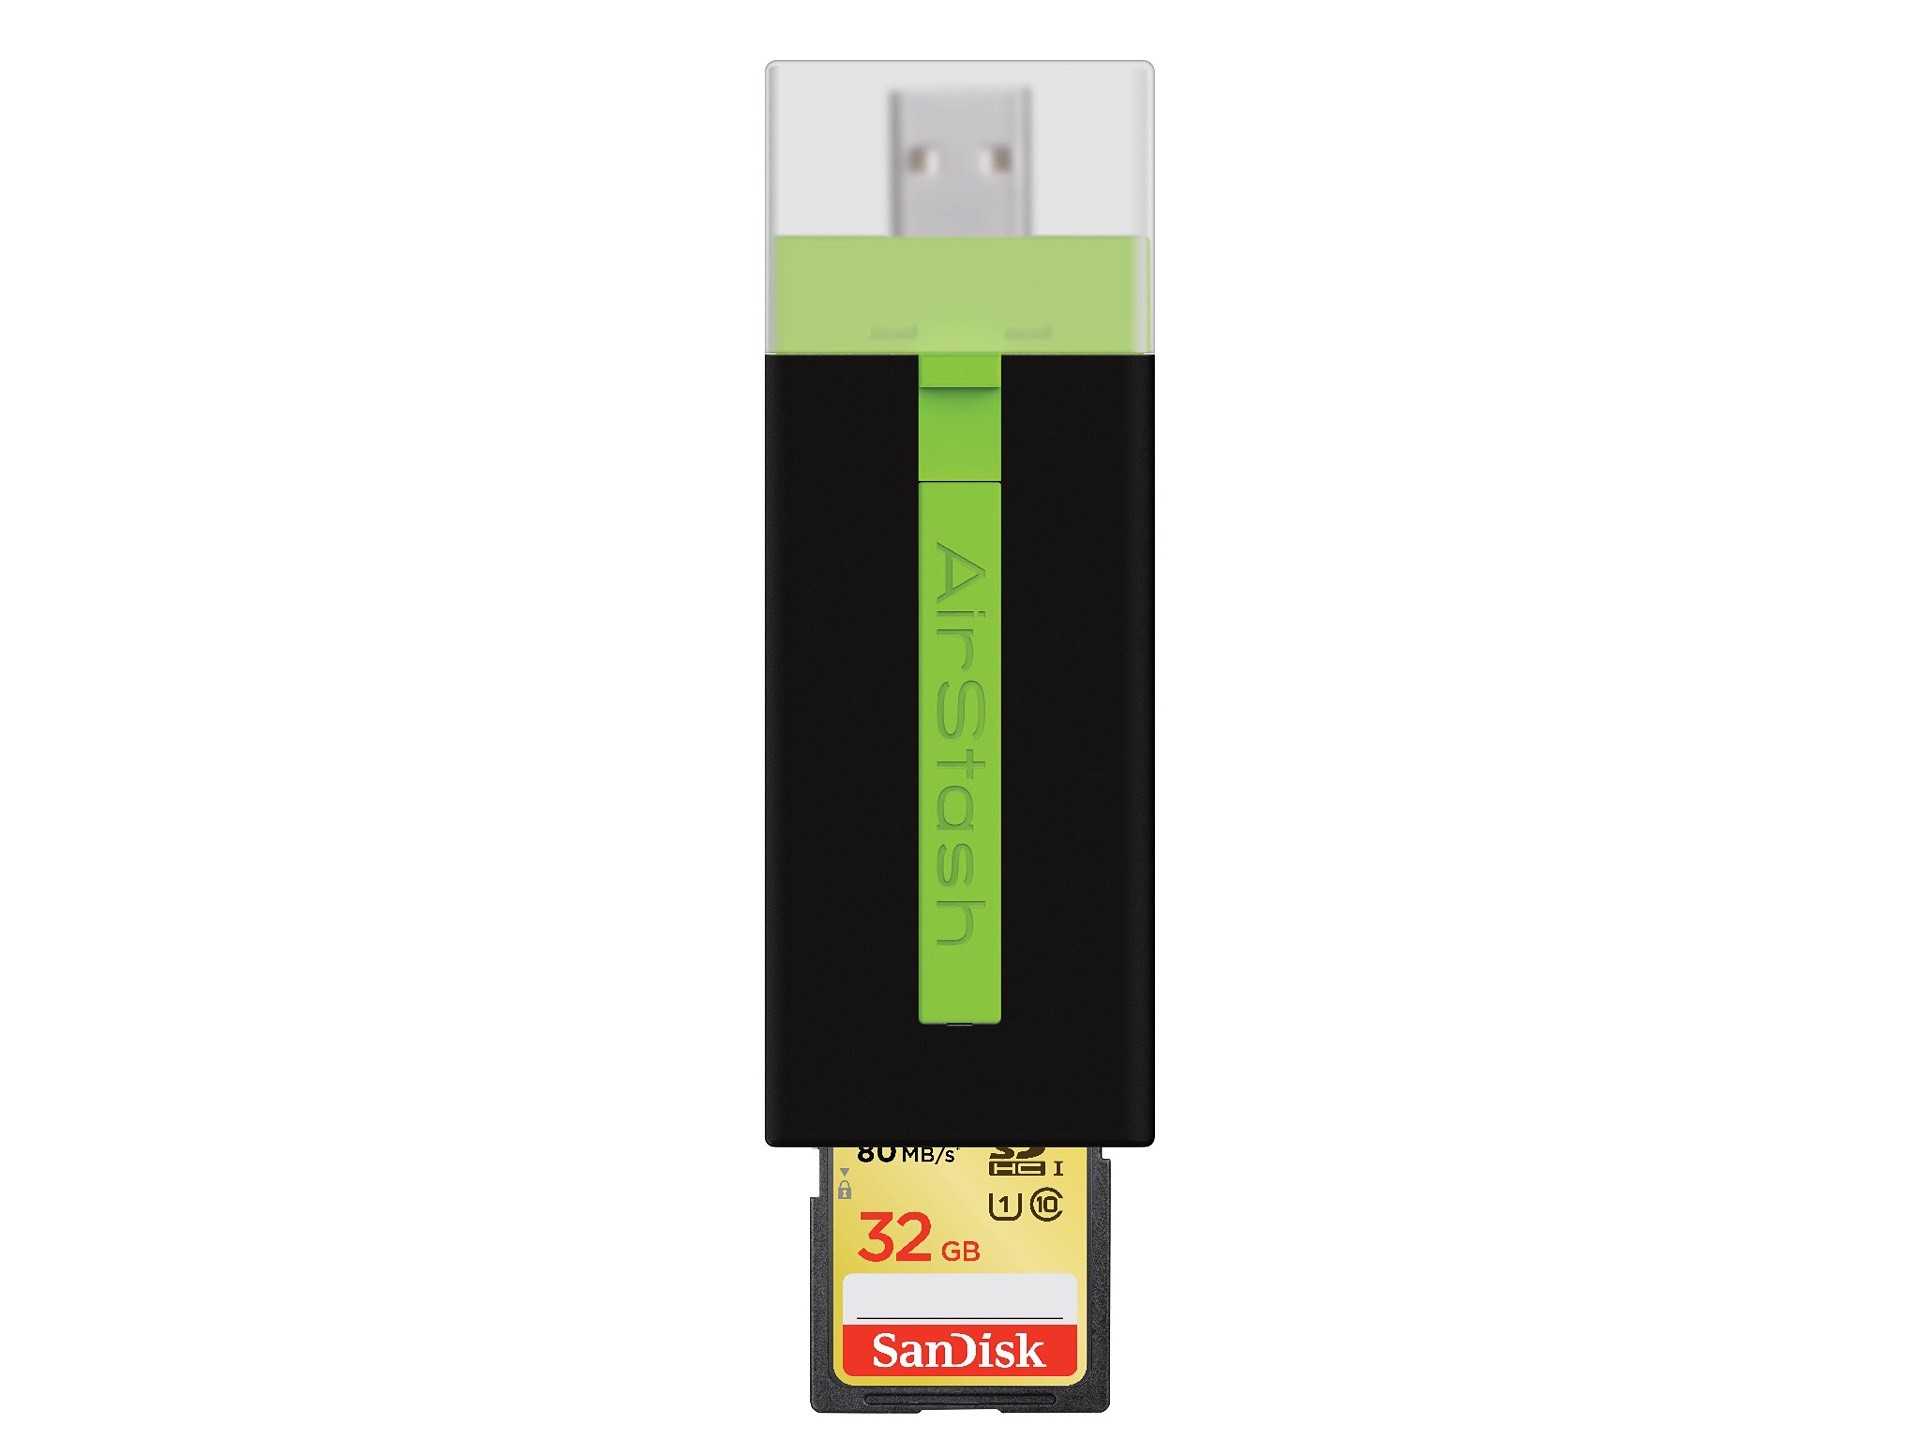
Maxell's AirStash A02 wireless flash drive. ($100)
Maxell AirStash A02 Wireless Flash Drive »
Now that you've got your audio recorded to an SD card, how do you get it onto your iPad for editing? This is where things can get tricky. Inexplicably, Apple's Lightning-to-SD card reader still doesn't support audio files — only photos and videos — so that's no-go.
What you need is something like the Maxell AirStash A02. It's a wireless flash drive that accepts SD cards and makes their contents available to other devices via a proprietary app. It bills itself as a media streaming solution but
The process goes like this:
- Plug in your SD card.
- Hold the AirStash's power button until you see the status light flashing.
- It creates a local Wi-Fi network your iPad should be able to see. Open Settings.app and connect to that network.
- Open the AirStash+ iOS app and locate the appropriate audio file.
- Tap and hold that file to bring up a list of options, including "Send to App".
- Choose the appropriate audio editor to have import the file, or failing that, send it to Dropbox, where many apps can pull the file from.
The thing about the AirStash A02 is that it's difficult to find on Amazon or anywhere else. In fact, as of this writing the only offer we can find is a single used one on Amazon for $100. If you're unable to get the AirStash, you might look into the Kingston MobileLite Wireless G3, which also has a companion iOS app.
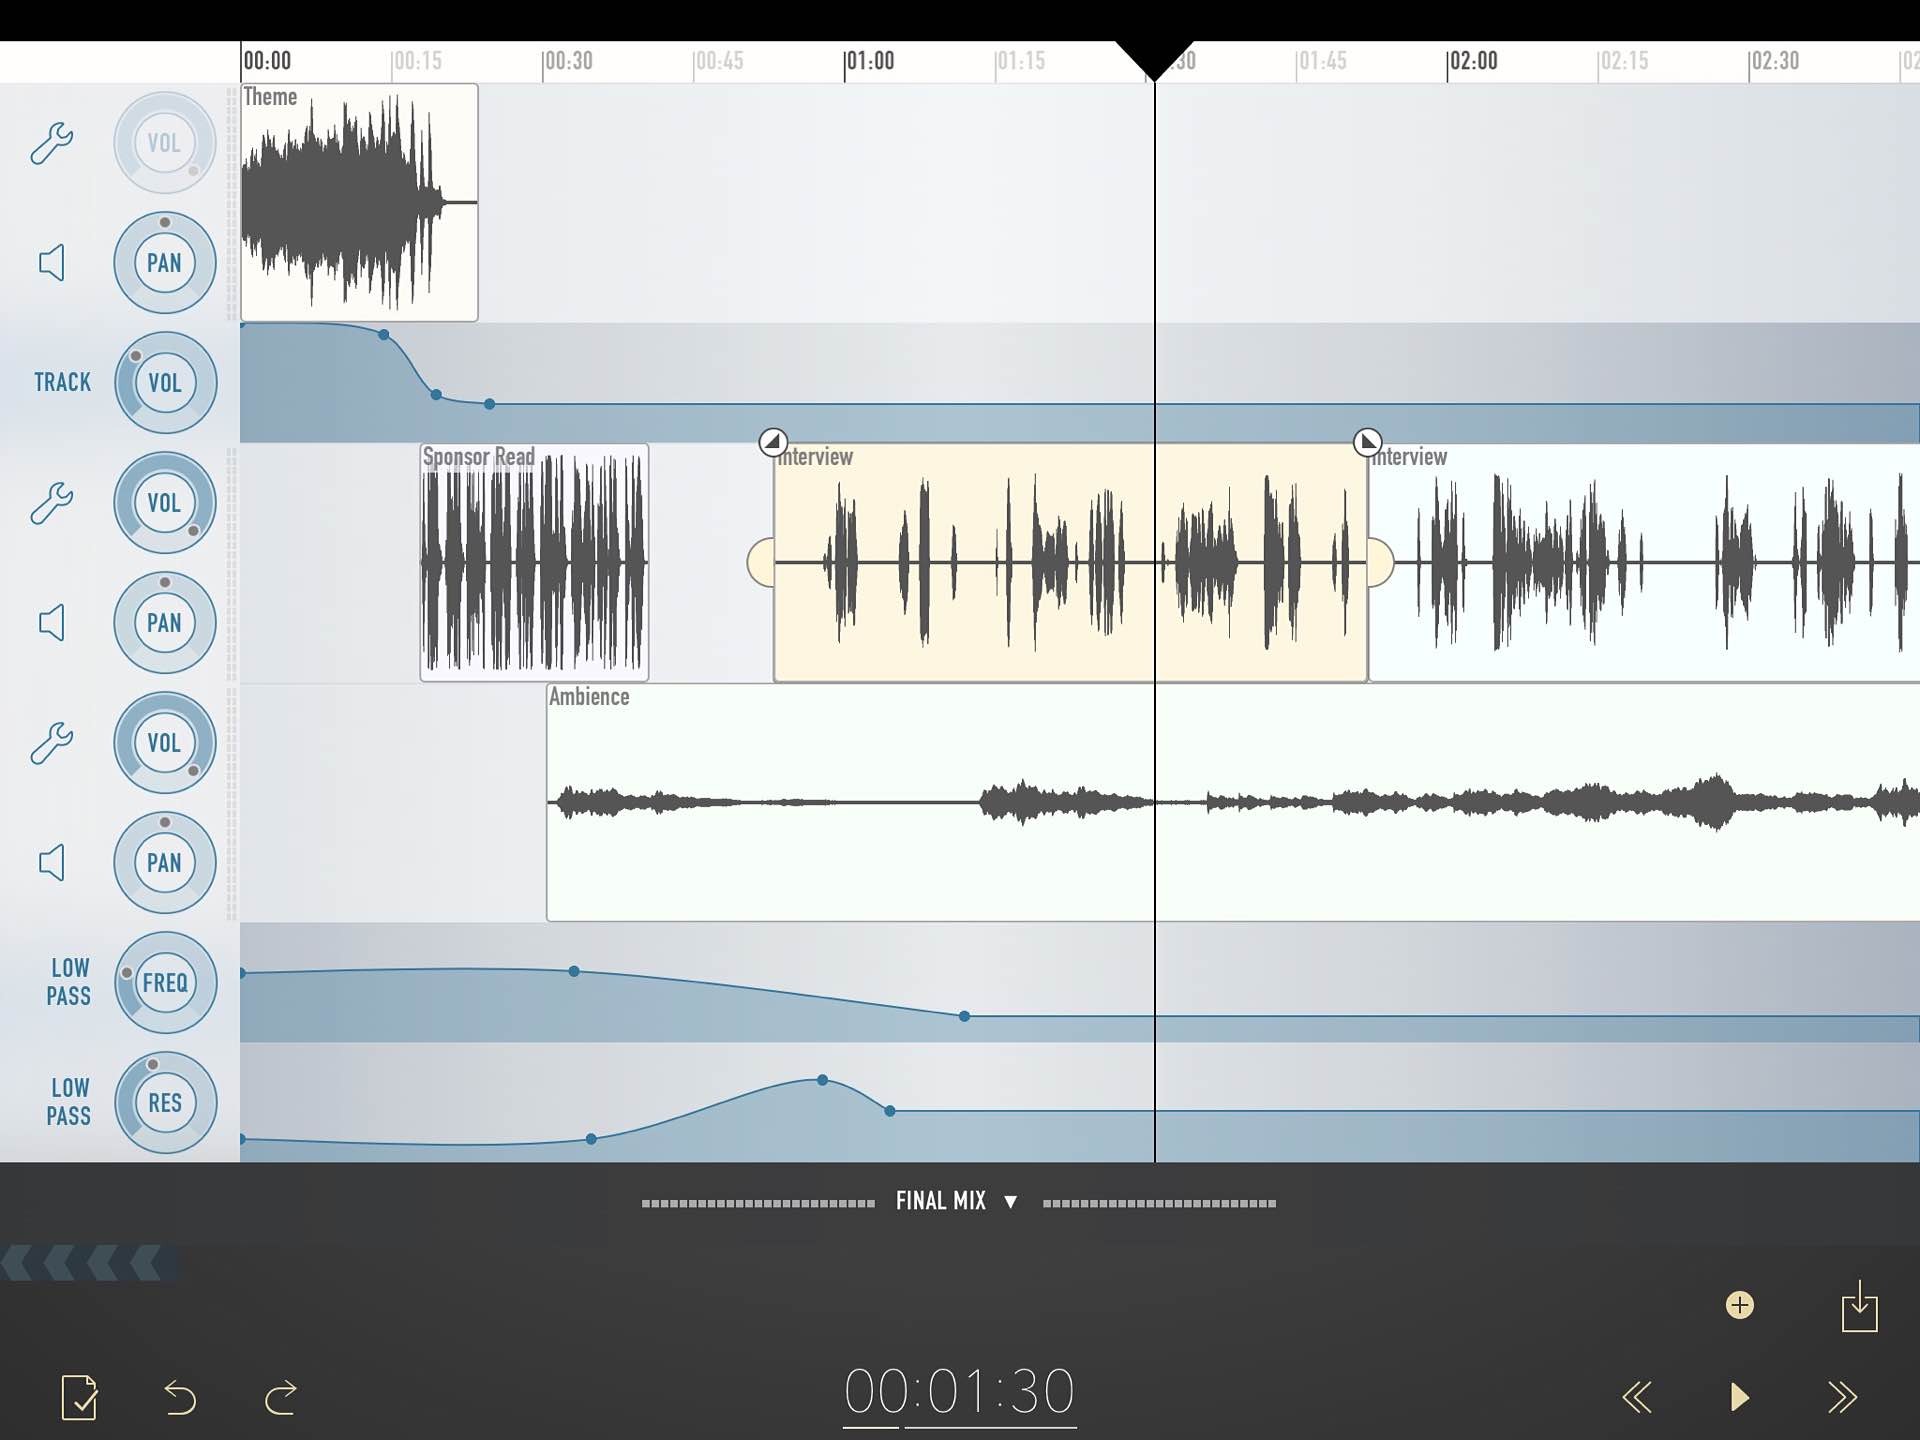
Ferrite for iOS. (Free, with in-app purchases to unlock more features)
Ferrite Recording Studio for iOS »
You've got your audio file ready to go. The question now is, what can you edit it with?
There are tons of great audio-editing apps on the iOS App Store. TwistedWave, Hokusai, and Auria are all powerful options. An app we like in particular is in fact made by the same folks behind Hokusai, and it's called Ferrite.
Jason Snell's overview says it all:
In a word, wow: This is the iOS multitrack editor that I’ve been waiting for. Ferrite has all the features that have made my podcast editing workflow so efficient: Strip Silence, compression, noise gate, ripple delete, quick selection of all following clips. It’s all there. And it’s all built inside an attractive interface that’s a pleasure to use. It’s like Ferrite read my mind.
The app itself is free and allows up to one hour of duration per recording. To go beyond that limit, there are a couple of in-app purchase options you can make: $10 lets you edit projects up to 24 hours long and also lets you edit 32 tracks as opposed to the default 24, while a $20 IAP includes those unlocked bonuses plus audio effects and automation features.
What's great is that, not only can you import audio files from Dropbox and other places, you can set up the AirStash+ app we mentioned above as an import location. Tap the wrench icon at the upper right, then it's Import Audio → More → Toggle on the AirStash+ option → Done
Once you've edited your podcast and exported the file to Dropbox or wherever else, it's up to you what to do with it based on how you get your show out to the world. If you don't already have a publishing mechanism set up, you can always use FeedPress and their mobile podcasting workflow to upload the file (a Dropbox link works great here) and generate a public URL that you can then share anywhere.
That's it! You've just set up an end-to-end mobile podcasting studio you can take on the road, no computer necessary.